
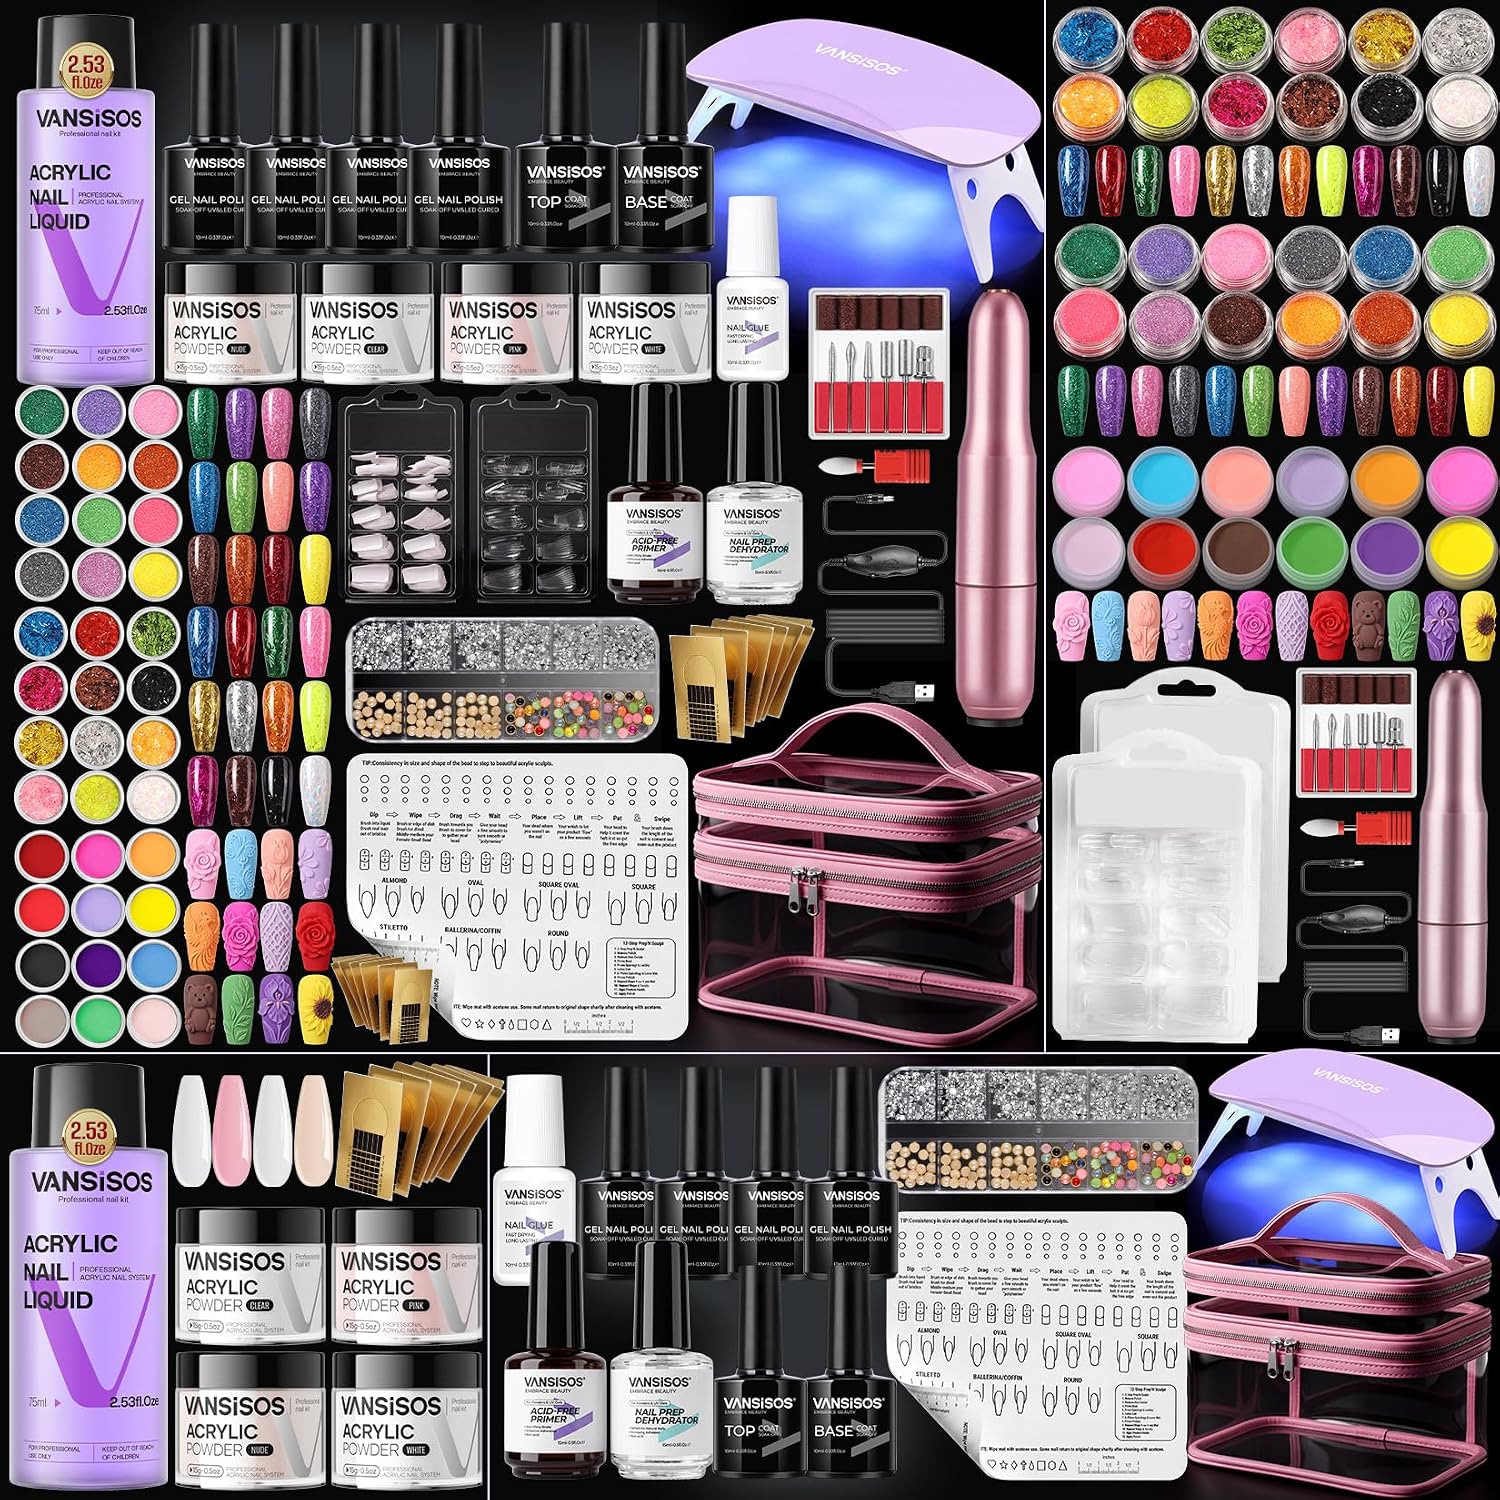
Learning acrylic nail application at home requires a reliable starter kit and clear expectations. This guide walks through the components, performance details, practical use tips, suitability, and minor limitations of a beginner-focused acrylic nail kit designed for home users. It highlights what the kit delivers and how to get consistent results while you build technique.
What the kit contains and how it’s designed
The set centers on a premium medium-fine acrylic powder formulated to wet smoothly and to self-level slightly for easier shaping. The powder is intended to form a workable bead when paired with an acrylic liquid; the kit also includes decorative glitter powders, nail forms, stamping tools, and a storage bag for convenience during travel or gifting.
Everything in the package is selected for beginners: components aim to be straightforward to handle and to reduce the chance of missing parts or unclear instructions that often frustrate first-time users.
Key material features
- Premium medium-fine powder: wets predictably and helps create an even surface while you shape.
- Slight self-leveling action: the powder smooths modestly after application, which can reduce the need for aggressive filing on initial attempts.
- Decorative options: multiple glitter powders and stamping tools allow you to try classic French looks, glitter effects, and simple 3D or textured styles.
- Practical extras: nail forms and storage bags keep supplies organized and portable for travel or gift-giving.
Performance and working time
The acrylic formulation is calibrated for home use and offers a reasonably forgiving working window. One notable specification is the set’s drying cadence: the product fully dries in about 5–8 minutes. That window gives learners time to form and place the bead without feeling rushed, while still allowing a normal pacing for shaping and smoothing before the material hardens.
Finished extensions made with this kit are described as resistant to chipping, lifting, and crumbling when applied correctly. That means with basic care and proper application you can expect a more durable at-home outcome than with very inexpensive or incomplete kits.
Practical step-by-step guidance for beginners
Below are concise, general steps to follow when practicing acrylic application with this kit. These are functional guidelines based on how acrylic powders behave and the kit’s stated working time.
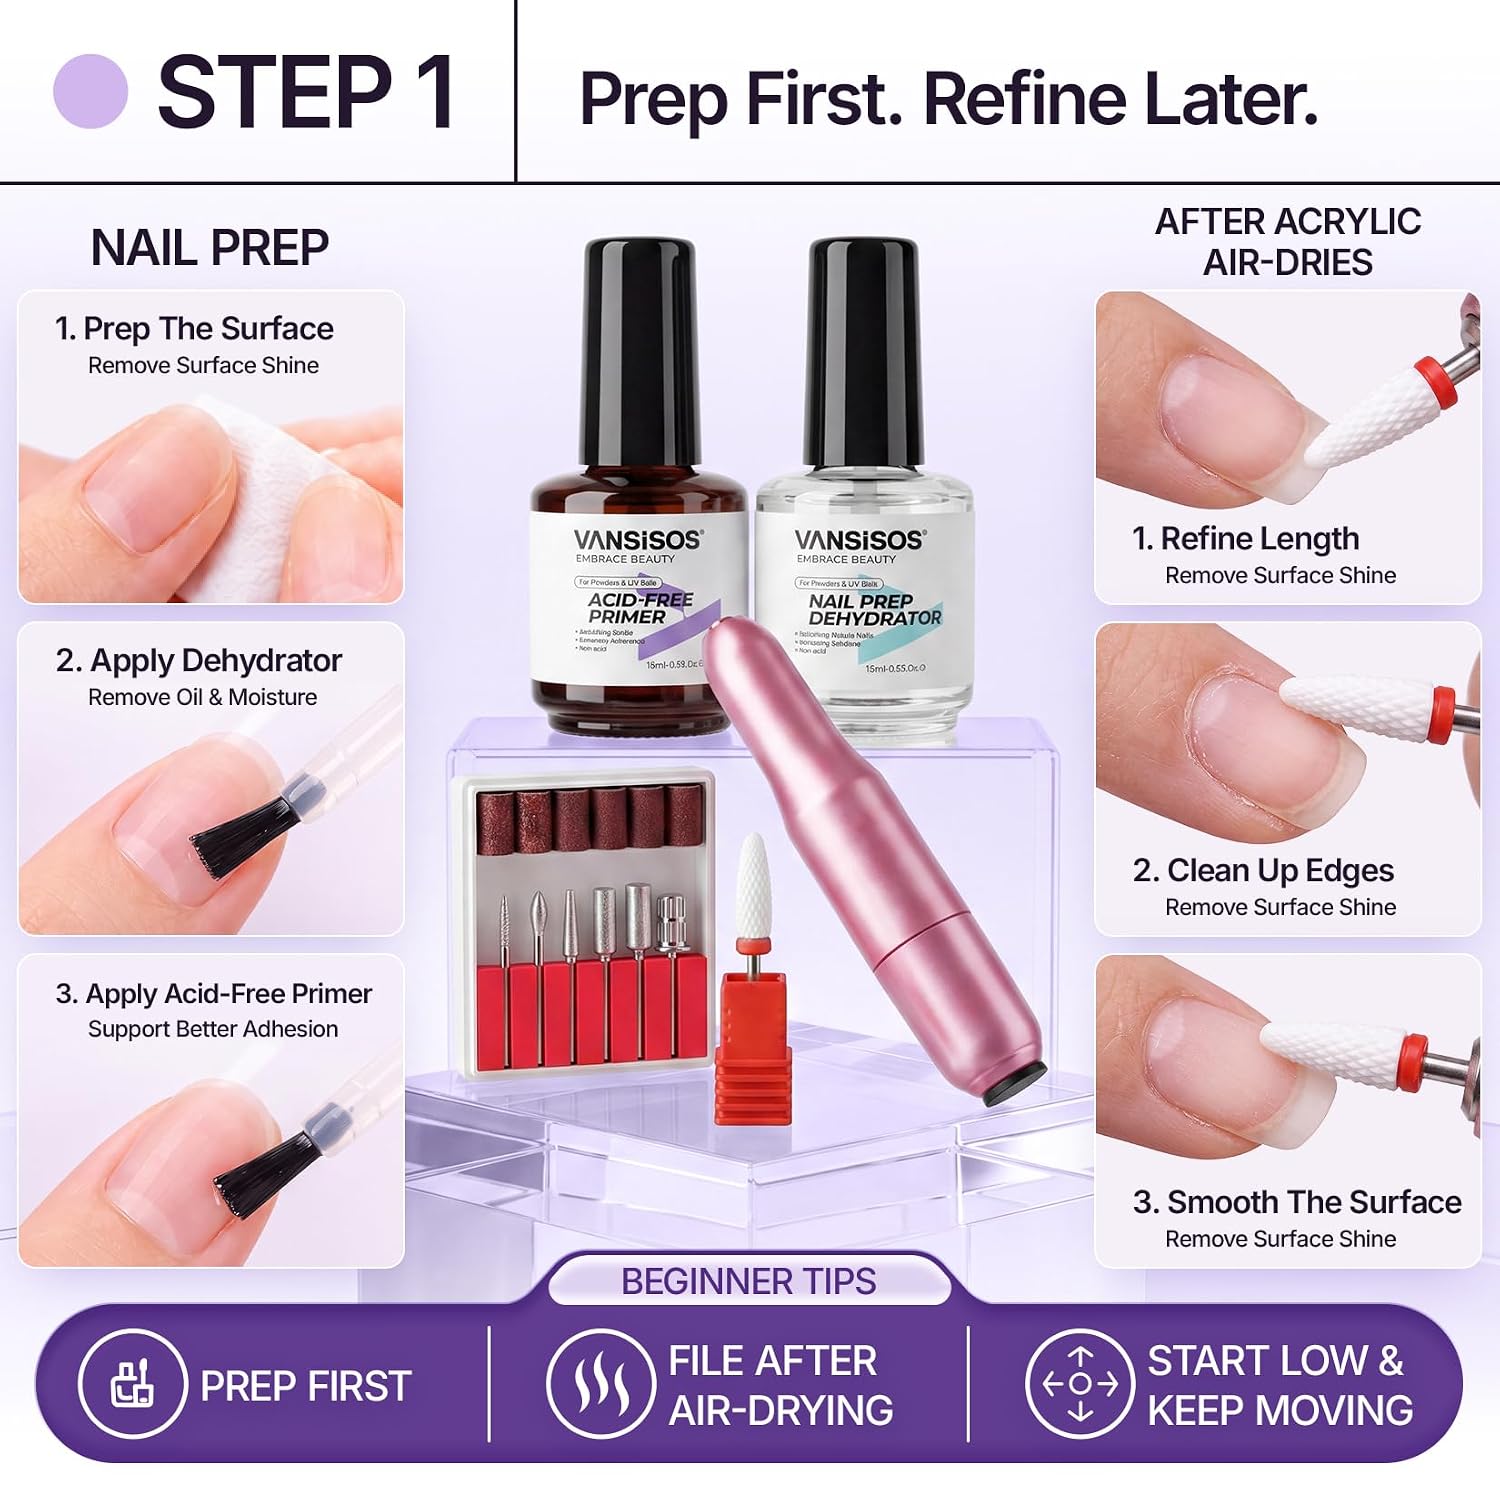
- Prepare nails: start with clean, dry natural nails and push back cuticles gently so the product adheres at the base without gaps.
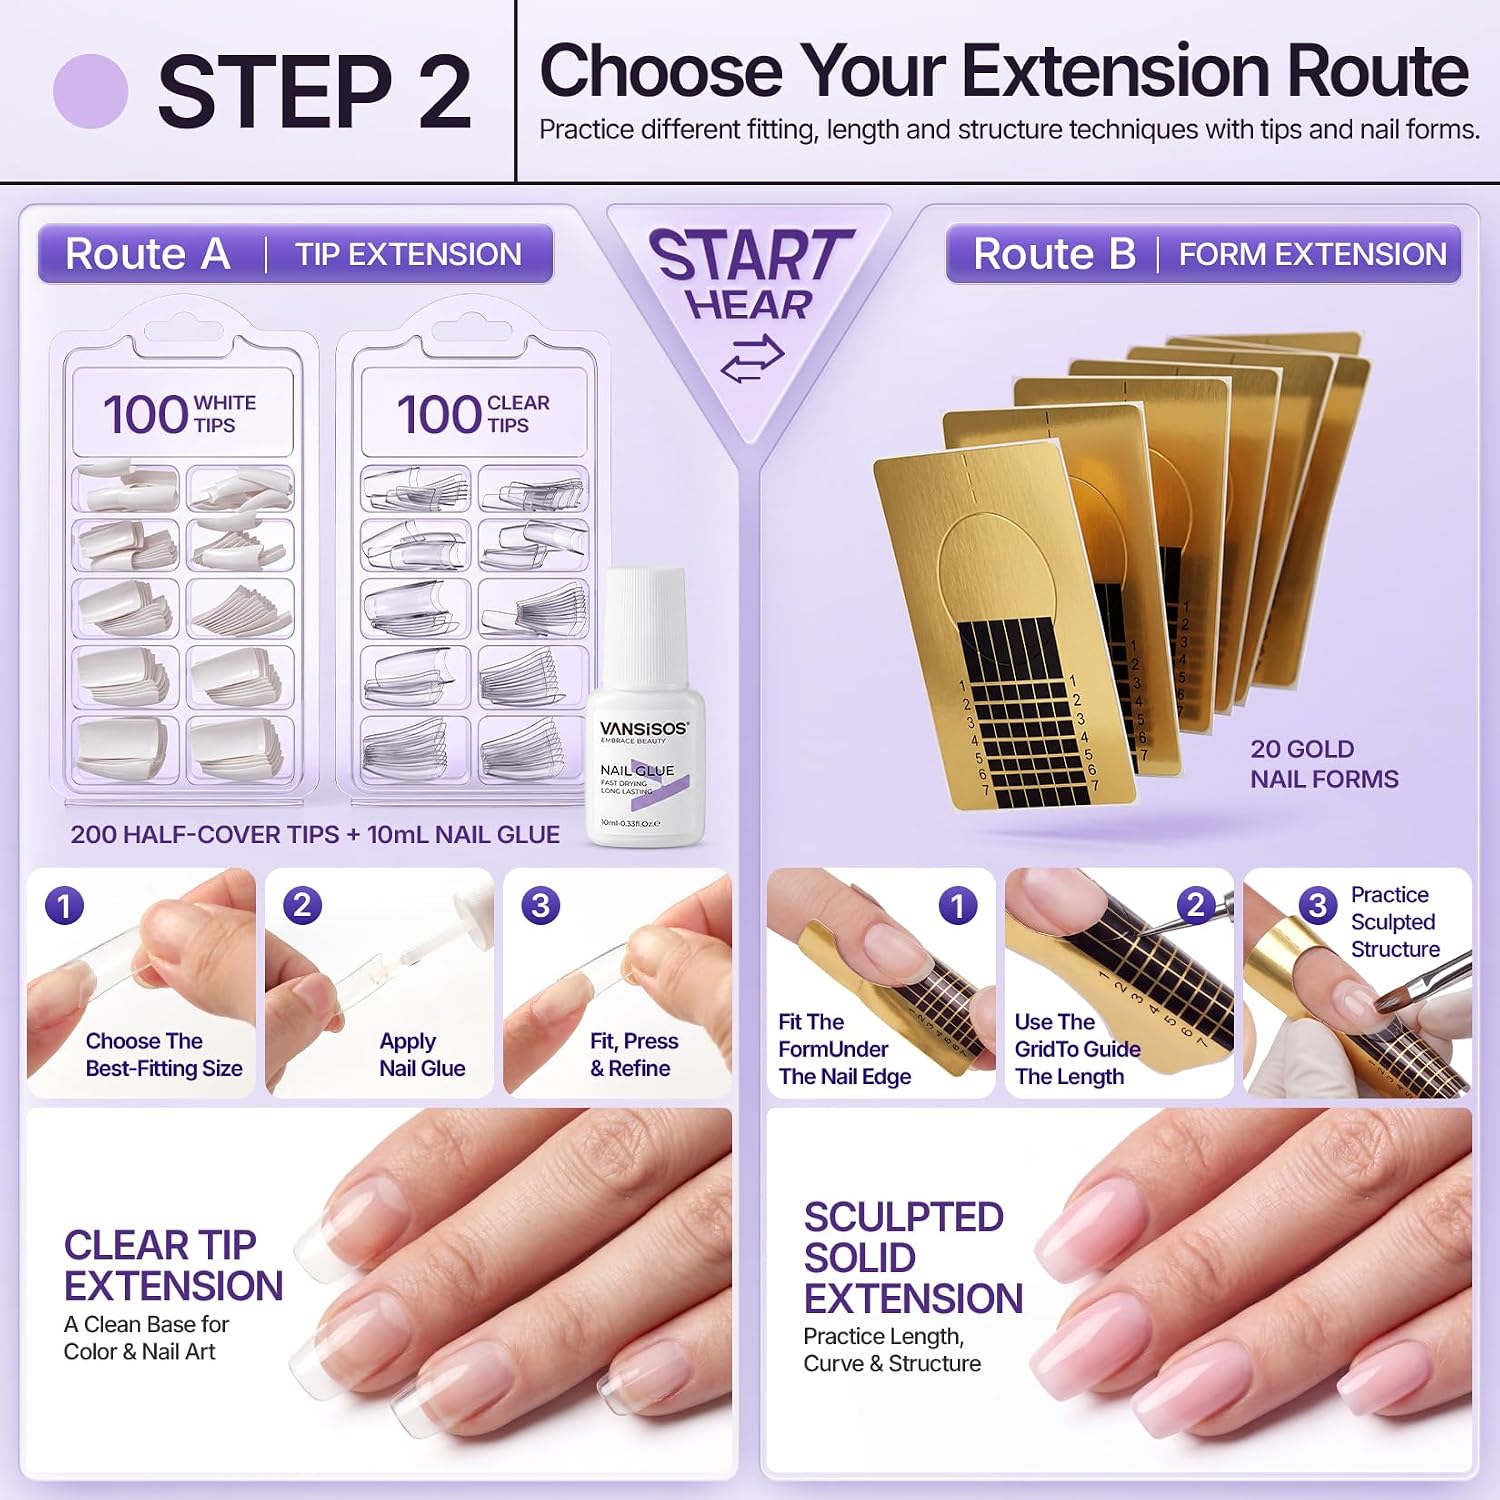
- Choose form or tip: apply a nail form or select an artificial tip if you prefer an extended base shape before applying product.
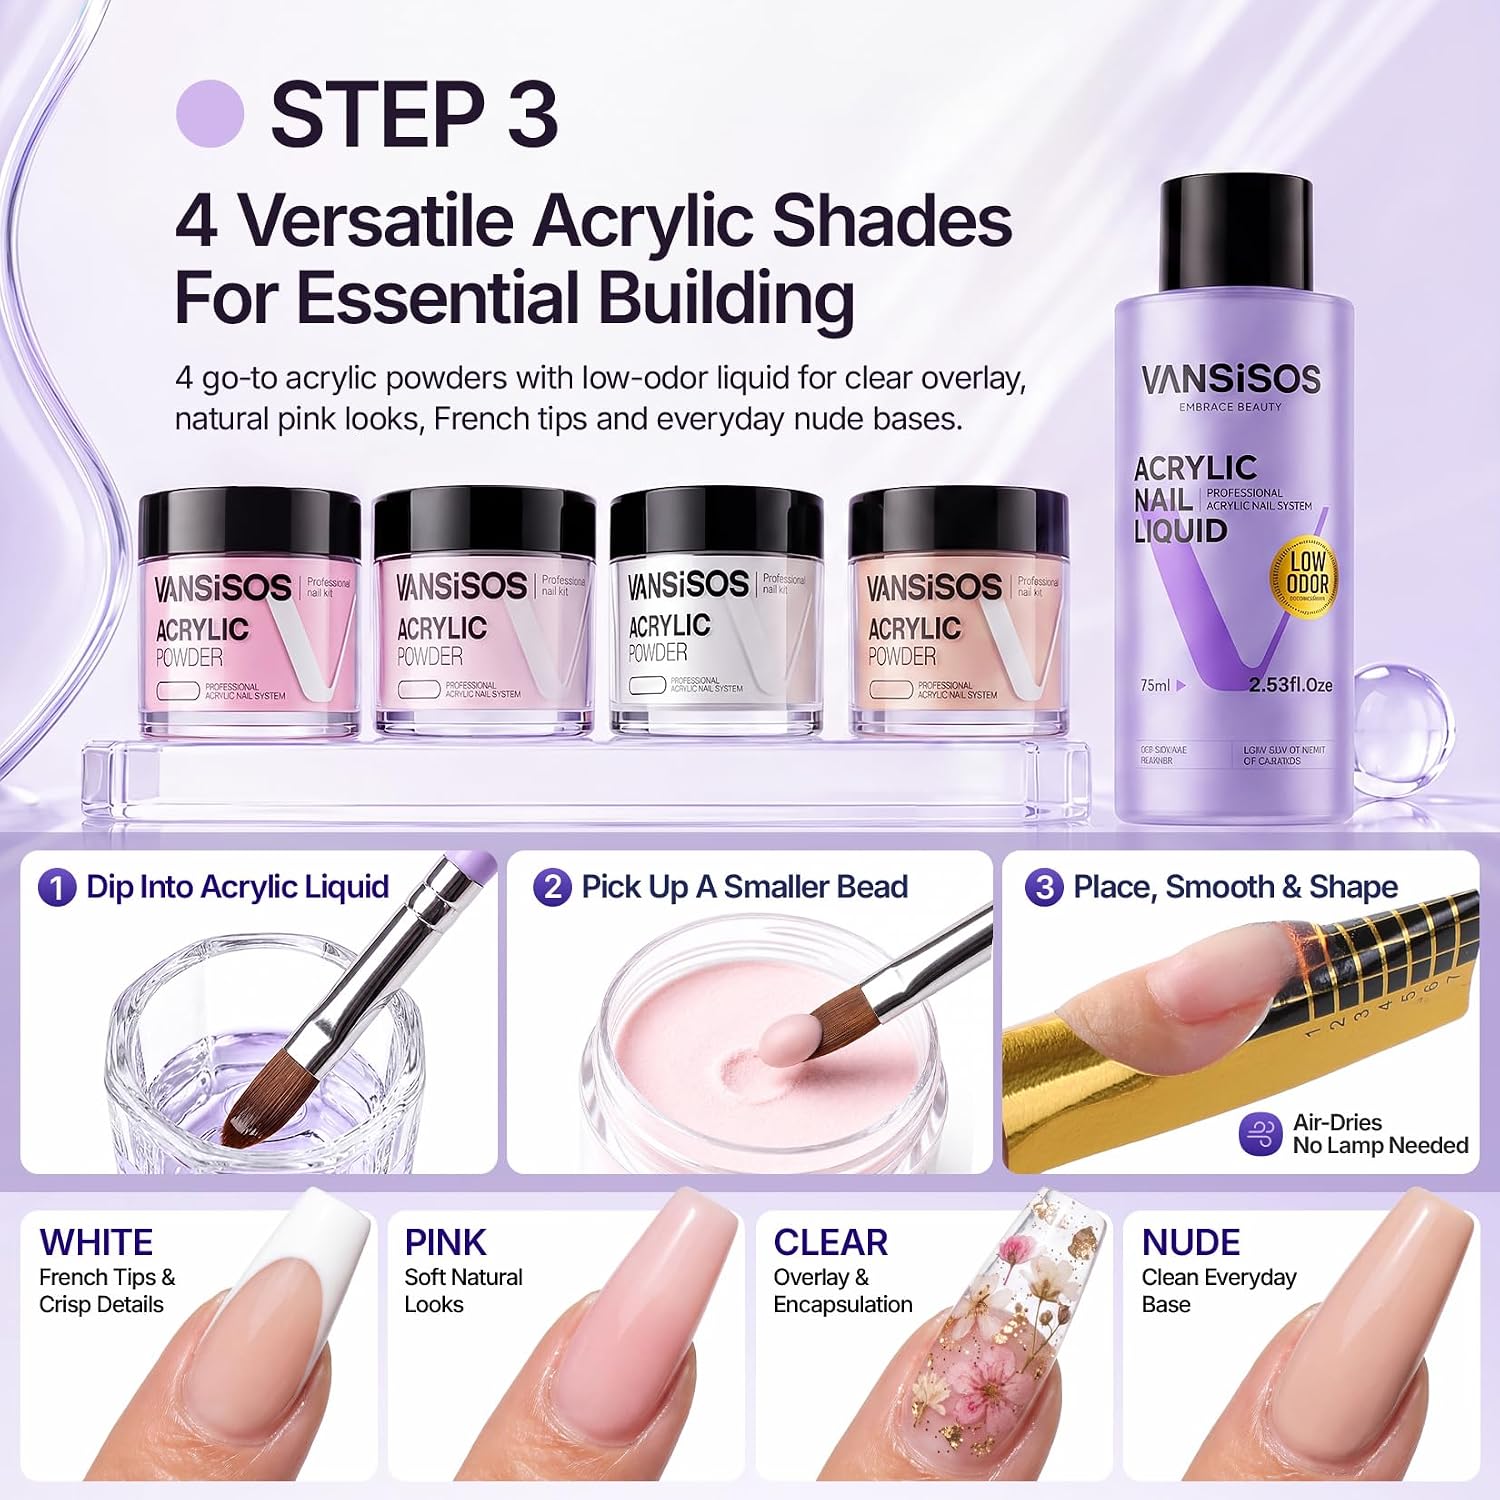
- Load your brush: dip a brush into acrylic liquid and then into the acrylic powder to form a bead. Work one nail at a time so the bead can be shaped within the 5–8 minute drying window.
- Place and shape: position the bead and gently press or sculpt it into the desired profile. The medium-fine powder and slight self-leveling action help achieve a clean surface with less aggressive filing needed later.
- Finish and decorate: once set and filed to shape, use the included glitter powders or stamping tools to add designs, then seal with your preferred topcoat or finish for wear.
Tips for more consistent results
- Practice bead size and placement on a practice nail or form to understand how the powder wets and self-levels.
- Work steadily but deliberately—5–8 minutes of drying time provides some flexibility, but beads should be shaped while still workable.
- If you plan to create more intricate shapes, adding a finer professional brush can improve control; for example, a Size 16 Kolinsky Brush is a common choice for shaping beads and detailing, see Size 16 Kolinsky Brush Size 16 Kolinsky Brush.
Who this kit is best for
This set is intended for people learning acrylic techniques at home, and it’s presented as a thoughtful gift for daughters, teens, or anyone starting out with nail art. It targets casual and event-focused uses as well—vacation touch-ups, school events, proms, weddings, and parties—where beginner-friendly materials and decorative powders help create a polished look without professional tools.
Limitations and suitability notes
The kit is calibrated for home users and learners rather than for heavy salon use. While the components aim to reduce common beginner frustrations (missing parts, flimsy tools, confusing instructions), advanced nail technicians who require high-capacity salon workflows or specialized professional-grade equipment may find the kit less comprehensive for high-volume service.
Also, the powder’s behavior depends on pairing with an appropriate acrylic liquid and correct technique; practicing bead formation and shaping will improve durability and appearance.
Care, support, and safety reminders
- Brush care: follow any brush-care guidance provided in the kit and contact support with questions about brush maintenance.
- Customer assistance: if the set arrives damaged or you need application tips or clarification about the acrylic powder, reach out to the vendor’s support team for help.
- Follow instructions: adhere to the included directions for best performance and store components in the provided bag to protect powders and tools.
Price and final thoughts
The listed price is USD 39.99; prices may change. For someone starting to learn acrylic nail application, this kit aims to combine approachable materials, decorative options, and portable storage so you can practice a range of looks while avoiding the frustration of missing essentials. Use the 5–8 minute drying window to practice shaping, keep supplies organized in the storage bag, and reach out to support if anything is unclear or arrives damaged.
In short, this acrylic nail kit for beginners provides a focused set of powders and tools to help learners build skill and create durable, decorative nail extensions at home.