
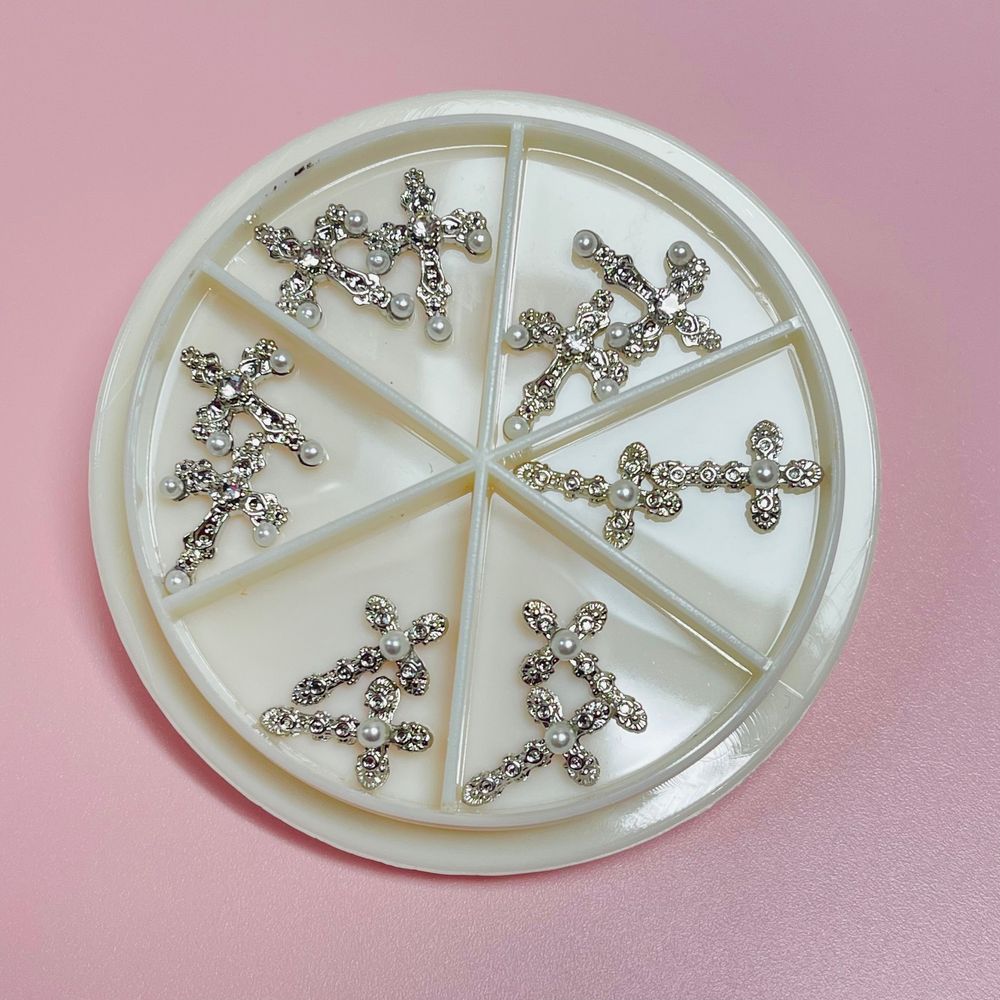
Small metal and rhinestone accents can transform simple polish into a statement manicure. A cross nail charms set gives beginners an easy way to add dimension and personality—especially for gothic, Y2K, punk, or seasonal Halloween designs.
What comes in this kit (and who sells it)
The set is packaged in a six-compartment wheel that holds twelve individual cross-shaped rhinestone charms. These tiny accents are ready to mix with gels, glues, or topcoats and are sold by Dynamic Nail Supply. The current listed price is $7.99, though prices can change.
Quick styling ideas to spark creativity
- Gothic or retro: place a single cross at the cuticle on matte black polish for a stark contrast.
- Y2K sparkle: cluster a cross with a few small rhinestones near the tip for a nostalgic bling look.
- Halloween accent: mix crosses with tiny skull or spider charms for themed nails.
- Subtle everyday: use one small cross on an accent finger over nude or sheer polish.
Tools and prep you’ll need
- Fine tweezers or a wax picker to lift charms precisely
- Nail glue or builder gel depending on desired hold
- Base coat, color polish, and a reliable top coat
- Small dish or tray to keep charms from rolling
Step-by-step beginner application
Follow these basic steps for secure, neat placement:
- Prep the nail: clean, shape, and apply base coat. Finish with your chosen color and cure if using gel.
- Plan placement: before glue, lay out where each charm will sit so you’re happy with the composition.
- Pick up a charm: use tweezers or a wax tool to lift a charm from the wheel.
- Apply adhesive: put a tiny drop of nail glue or a dab of uncured builder gel where the charm will go.
- Place and press: set the charm onto the adhesive and hold for a few seconds to set. If using gel, cure per product instructions.
- Seal edges: apply a thin bead of top coat around the base of the charm to reduce snagging (avoid covering large rhinestones entirely if you want maximum sparkle).
If you’re ready to buy a starter pack, shop the cross charms set.
Placement and adhesion tips that matter
- Use minimal glue—excess adhesive can squeeze out and look messy.
- For longer wear, anchor the charm over cured gel and then cover the attachment point with a layer of builder or sculpting gel.
- Position charms on thicker parts of the nail (center or lower third) to reduce lift from daily activities.
- When using a top coat, focus on sealing around the charm base rather than sealing the entire surface of large rhinestones, which can dull the sparkle.
Care, removal, and safety notes
Check these basic safety and maintenance points before you start:
- Remove charms by soaking in an appropriate remover (acetone for acrylic/gel systems) or by gently prying after softening adhesive—avoid force that can damage natural nails.
- Watch for skin irritation around glued areas; stop use if redness or sensitivity occurs.
- Store the wheel in a cool, dry place so tiny parts don’t tarnish or get lost.
- Keep charms away from small children due to choking risk.
Who this set is best for
This twelve-piece cross charm wheel is ideal for nail artists building a specialty kit, hobbyists exploring gothic or Y2K looks, and salon technicians who want quick accent options for theme services. Because the charms are ready to apply, they’re especially friendly for beginners who want striking results without complex tools.
Final thoughts
Cross nail charms are a small investment that can dramatically change a manicure’s vibe—from subtle to statement. With simple tools, basic adhesive technique, and a little planning, even first-time users can achieve professional-looking accent nails. Keep the wheel handy for creative touch-ups and seasonal sets.